5 tricks to get the most out of Microsoft Word and Excel
By SleekMart
Useful tricks to get the most out of Microsoft Word and Excel. Whether you work in corporate offices or run your own small business, you probably spend some of your days using mainstays of the Microsoft Office Suite. Microsoft Word and Excel are the most commonly used apps in MS office.
You’ll want to get the most out of these applications that you can. And with some functions not being especially obvious, you might be missing out. Tap here for Bluehost review. Full-featured web hosting for demanding users.
That’s why we’re going to tell you some expert tricks that will help you get the most out of Microsoft Word and Excel. Read on for these tips and start enjoying a better experience today.
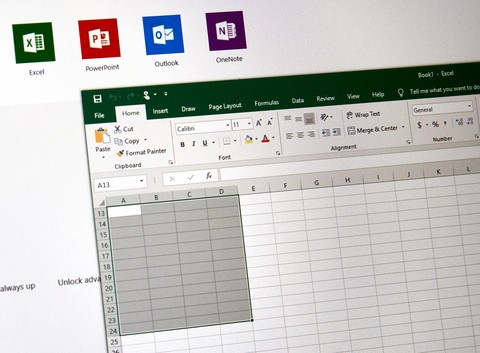
If you’ve ever used Excel, you know you can input formulas in cells, and the program will run them for you. Excel formulas can help you find things like the total sum of a set of numbers, or their average or median.
Generally, you need to know and type out the formulas for functions in order for Excel to run them. But Excel has a secret shortcut when it comes to totals — you can find the total of a row or column in your Excel table without having to personally input a formula at all.
The formula will automatically generate, giving you a chance to select or deselect certain cells from the sum by clicking and dragging the area you want to add up, or just hit enter to have the formula run. And that’s it, you’ll have your total!
This is definitely a tip that can really speed up making things like expense and budget sheets, or anything else with a lot of addition. Use it often to enjoy extra efficiency while you make your spreadsheets.
2. Collaborate on a document in Word
You can share a document by saving it to OneDrive, Microsoft’s cloud service, and clicking “Share,” sending the document to colleagues or friends who you want to have access to it.
From there, you and your colleagues can work on the document together in real-time, leaving comments and making edits as much as you need to. You can also write whole sections independently at the same time.
A shared Word document can be edited in Word Online — which is what you’ll be linked to if a colleague sends you a shared document. Or, you can edit it in your Word application if you’d prefer having Word’s full functionality.
You’ll be able to see who else is accessing the document at the same time you are and you’ll be able to collaborate that much better because no one will ever be left off an email chain, or miss an update.
3. Go from rows to columns, or columns to rows in Excel
Ever make a table in Excel, only to decide that the layout would be better in the opposite direction? Or maybe when inputting data, you make a mistake and put things that should be in rows into columns.
Then, in the Home tab in Excel, click on the arrow below or beside the Paste icon (the clipboard). Slide down to “Transpose” on that list, and you’ll have the data you’ve input flipped from row to column, or column to row.
The transposition will happen on whatever cell you have highlighted when you click “Transpose,” so keep that in mind after you copy your data. It can be tricky to paste over the data you’ve copied with this trick, so plan on pasting elsewhere and shifting the data over by clicking and dragging your selected cells wherever you want them later.
4. Make things look nice in Word using themes

To make reports or write papers with impact, they have to be well-written. But it can help to have them look nice, too. Fortunately, you can quickly make any document look good in Microsoft Word, and you don’t need to know anything about graphic design or fonts for it to work either.
Under the Design tab for versions of Word after 2016, and on the Home tab for earlier ones, click “Themes” in the Document Formatting group.
You’ll be shown a menu of premade options that will determine the color scheme, font, and heading styles of your document, and you can select whichever one you think is best for your needs. For a community newsletter, you can make things fun and bright. For a corporate report, you can make things sleek and easy to read.
Themes are customizable if you want to make your own. Simply click “Custom” under the Theme menu, and you can set your own colors and designs based on your own preferences.
But the pre-loaded themes, with their handy preview images, will give you some gorgeous options that will take any drab document and make it more professional or fun.
5. Freeze column and row headers in Excel

Sometimes, a table or list on Excel gets incredibly long and you can’t see the headers at the top that explain what the data you’re looking at means or what it applies to. Prevent that problem by freezing panes in your Excel view, so you can scroll and always keep headers in your view.
To freeze panels, go to the View tab in later versions of Excel, or the Layout tab in earlier ones. Click on the “Freeze Panes” dropdown menu, which has an icon of a spreadsheet with some crossed out boxes in the top and left rows, and usually a blue cell in it.
To freeze the top row and capture headers there, click the “Freeze Top Row” option. Keep in mind the top row that will be frozen will be the one in your current view of the spreadsheet, so make sure you’ve scrolled to the top of the table before selecting this option.
To freeze the left-most column, click the “Freeze First Column” option. Once again, it’s the first column in your current view that will be frozen, so make sure you’re all the way left where you want to be.
To freeze both the top row and the first column in your spreadsheet, click on the top, leftmost cell in your spreadsheet that contains data; a cell where data begins. If you have headers in row 1, and headers in column A, this cell will likely be B2.
Frozen panes will stay frozen when you save and exit a spreadsheet, which can be really helpful in keeping a spreadsheet easy to scroll through, particularly as you re-enter it to add more data.
To unfreeze panes if you ever need to, simply click the “Unfreeze” option under the “Freeze Panes” menu, which is usually your only option once you have panes frozen. You can freeze again in a new view later, or leave the spreadsheet as is if that’s your preference.
These were our tricks to get the most out of Microsoft Word and Excel. To know more about your Tech Queries , contact me at msg@thesleekmart.com